Monday, August 31, 2009

It Brings Us Together

The other day I went by my daughter's Orthodontist's office to pick up her retainer. Straightening this child's teeth has been a long, arduous, and expensive process and I've visited this office a lot over the past three years. I've also interacted with the office staff, doctors, and technicians that work there. It must be a decent place to work because there doesn't seem to be a lot of turnover. So, the other day, the technician that approached me to discuss Rachel's retainer was not unfamiliar to me. I hadn't chatted with her before, but I'd definitely seen her there.
At this point in my little tale I should note that I was wearing a top I'd made using this pattern. This too is not unusual as I make a lot of tops and am often wearing something homemade.
The technician approached me and complimented me on my shirt. I thanked her and asked a question about the retainer. In answering my question, she motioned me over to her computer and asked me where I had purchased my top. That's when I got to proudly proclaim that I made it myself, probably one of my top ten favorite statements. The technician smiled and said something that would bring us together not as patient and care provider, but as sisters. She said she loved the pattern, she also sews, and do I remember the pattern number so she can buy a copy.
These pictures have nothing to do with the post. They're just here to look pretty.

Any interest I had in Rachel's retainer, the state of her teeth, or anything dentally oriented flew right out the window. The technician wanted to know if I could recommend other patterns that were fun and easy to sew and, best of all, did I have any preferences for sourcing fabrics. We were speaking the same language. And, as I told her, it's a language I don't speak that often in my day-to-day interactions. She apologized for taking up my time with non-orthodontic questions, but I didn't mind. I was so happy to talk to a fellow sewer, I could have spent the rest of the afternoon there. I even found that I noticed things about this woman that I'd never seen before. Were her eyes always so bright? Had she always had such a great hair color? Her interest in sewing was making her more appealing in general. I was so excited about what she might sew and in what fabric.


When I walked into the office I felt rushed and a little annoyed. This was my second trip there in the same day because they'd taken the mold for the retainer that morning. I just wanted to get what I needed and go. When I left though I was smiling and felt content and happy. It's amazing what finding a kindred spirit and a few minutes spent chatting about seam allowances can do for a hot, summer afternoon.

Wednesday, August 26, 2009

Hex Pincushions


I don't know what sent me over the edge, but there definitely came a point when I couldn't take it anymore. Everyone else seemed to have one and I felt deprived and a wee bit resentful. So, I took action.


For years I've been using a store-bought pincushion which has been growing more and more ratty with time. It had gotten so bad that I'd stopped returning the pins to the pincushion and they'd scattered around my studio. Couple that with all the cute pincushions I'd seen on the internets and I was ready to remedy the situation.

I've had a minor obsession with hexagons lately so it seemed appropriate that my pincushion should take that form. I was super happy with the way it turned out and quickly adorned it with pins gathered from table and floor. My joy lasted a good five minutes before I started wishing I had a another pincushion devoted to needles. Spurred on by my initial success I made a second one, but with a little variation.


I string pieced the parts of this pincushion and focused on fabrics in shades of red for the body and paired that with an aqua fabric for the binding.
Having righted the wrong that is having to use a crappy pincushion, I felt inspired to share my joy with others. Knowing that you all are a crafty bunch I've written up this tutorial to help you make your own Hex Pincushion. The tutorial includes a template which I'll include as an image in this post. I'm guessing you can run your cursor over that image and print yourself a copy of the template.
Edited to add: Reduce the size of the copy by 65% to get an accurate template.
OK. Here we go.

Hex Pincushion Tutorial

Finished size: About 5" from point to point

Materials:

Scrap fabrics
1/4 yard of fabric for binding
Hex pincushion template (figure 1)
Paper scissors
Rotary cutter and self-healing mat
Quilter's clear acrylic ruler
Sewing machine
Sewing machine thread
Hand sewing needle
Hand sewing thread
Pins
Iron and ironing board
Stuffing


Figure 1


Cutting the fabric:

Using template cut 6 hexagon thirds out of 6 different scrap fabrics
From binding fabric cut 1 1/2" strips on the bias.
Note: To cut bias binding, I begin by making sure I have a straight edge along the lengthwise or crosswise grain. Align the short edge of a clear ruler with straight fabric edge along 45 degree line and cut. Reposition ruler so that cut line measure 1 1/2" from long edge of ruler and cut. Repeat to make more binding strips.

Sewing Hexagon Top and Bottom:
Note: All seam allowances are 1/4"


Figure 2

1. Referring to figure 2, pin piece #1 and piece#2, right sides together matching outer corner and center point.
2. Machine stitch together from outer corner to center point stopping 1/4" short of center point.
3. Cut thread.
4. Match outer corner and center point of piece #3 and piece #1, right sides together, and pin. (figure 3)
5. Starting at outer corner, stitch towards center, stopping 1/4" short of center.


Figure 3

6. Finger press seam allowance of pieces #1 and 2 towards piece #2.
7. Align the center and outer corner of piece #3 and piece #2 and pin. (figure 4)

Figure 4

8. Starting 1/4" from center, stitch to outer corner.
9. Press seams toward piece #3.
10. Repeat steps 1-8 to make a second hexagon.

Assembling the Pincushion:

1. Stitch together binding strips using diagonal seams .
2. Attach binding strip to right side of one of the hexagons as you would for a quilt top.
3. Align hexagon without binding strip underneath hexagon binding strip, wrong sides facing. 
4. Pin hexagons together through center.
5. Turn binding toward underside hexagon.
6. Begin hand stitching binding, remembering to turn under 1/4" seam allowance as you work, to hexagon.
7. Gently miter the corners as you come to them.
8. Stop short of stitching binding all the way around shape, leaving a small gap along one of the hexagon sides.
9. Stuff pincushion so it is full, making sure to push stuffing into corners.
10. Sew remaining binding to hexagon.
11. Machine top stitch close to binding seam.
12. Add pins and smile! 


A Wee Disclaimer: Feel free to make as many of these puppies as you like for friends, family, neighbors, and others suffering through life with store-bought pincushions, but please do not make these for sale.
Thanks and enjoy!


Monday, August 24, 2009

Cobbled Together

I cut into some fabric the other day with the intention of making my first project from this Japanese sewing book . I was feeling pretty emboldened by a previous success. Admittedly, that one did involve instructions in English, but it didn't have the plethora of diagrams that the Japanese pattern had. Actually my major impediment in making both patterns was that I had to trace the pattern and add seam allowances. There's something about methodically adding seam allowances to mark the cutting lines that just reminds me of emptying the dishwasher-- I'm glad when it's done, but the process feels so unsatisfying. My first attempts to trace the pattern were stymied by my choice of tracing paper. I couldn't find the near entire roll of tracing paper I'd bought and tried to use a very thin Japanese paper I had on hand. I saw the appropriateness of using Japanese paper, but it wasn't exactly transparent and I felt like I was trying to see the lines of the pattern through spilled milk. Add to that the fact that the pattern I was tracing wasn't the only one on the page and my first attempt at a Japanese pattern was looking to be my last. Eventually, I made a more wholehearted effort to find the tracing paper and discovered it pretty much where it should be, on my cutting table. Armed with the gift of transparency, I ventured forth and traced. It went much faster this time and there wasn't nearly as much cursing.
I happily cut and sewed and generally found that not being able to read Japanese might have left me out of a few specifics, but that the diagrams and my existing knowledge were going to get me through. As usual I didn't make a muslin, but I was reassured when I tried on the bodice. This was before I added the skirt, but I figured the biggest hurdle was that it fit well around my bust since the skirt needed gathering and would have a little more room for adjustment. The bodice looked great and I was feeling pretty self-satisfied.
I added the skirt, tried it on again, and although it fit, I was relatively sure I hadn't worn something that full since I was 9 months pregnant. I know that loose and formless is a "look", but it's not "my look". I was so frustrated that I just buried the top underneath some other fabric. Usually, it would stay buried for at least a couple months, but that night I had what I thought was a solution to my cute bodice/skirt that ate Cleveland top. The next morning I separated top from bottom, added a pair of darts along both the front and the back of the bodice and attached a skirt from a different pattern, one whose skirt I'd sewn before and liked. I finished the top with the sleeves from the Japanese pattern and tried it on.
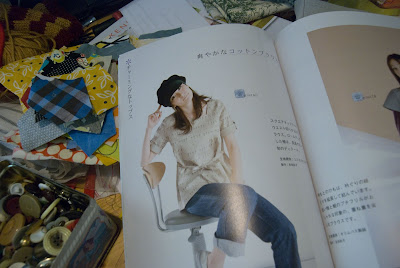
Before I show you my cobbled together version, I wanted to share the example pictured in the pattern book.


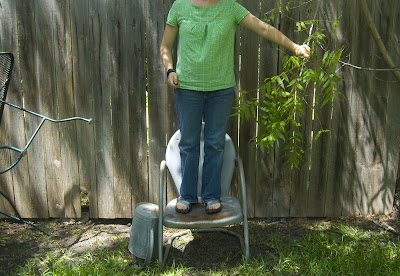
She looks pretty jaunty, doesn't she?
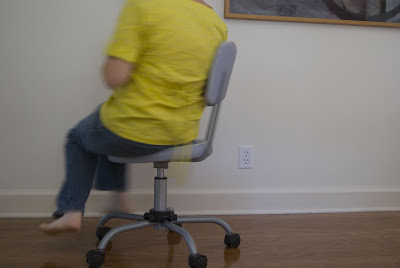
Well, I've got a rolling chair too.


And mine spins.

Monday, August 17, 2009

I've got mail

Today my eldest daughter was beginning the college application process. Pretty daunting, but that's a whole other post. Anyway, she wanted to know what to list my profession as. I answered her over my shoulder as I opened the day's mail, saying " I guess you can call me a textile designer...that seems pretty accurate." Then I opened my mail and decided my job description needed amending.


" Add author to the job description," I said, because today the mail carrier brought me an advanced copy of my book.
There are things that you assume you'll do in your lifetime, so when they happen, you're pleased, but not surprised. I always thought I'd get married, so happy as I was on my wedding day, I wasn't exactly astonished. The same is true for being a parent. I was thrilled, excited, nervous, but not taken aback because I never thought it would happen. Even with my work and business, which I thoroughly love, I never had a hard time envisioning myself in that role. But, being an author, having a book out there with my name on it, I never imagined that happening. It makes me realize that as great an experience as writing the book and designing the projects was, the best part of this journey has been being surprised by life. That's the real gift.

Friday, August 14, 2009

Bees do it

Be busy that is. I've had been plenty of that around here lately. Yet, despite that, the images I'm sharing today hint at the work going on without showing any finished product. How does that work? I guess I'll chalk it up to being "in process". I'm currently working on a big project, but can't quite share news of that yet. That partly explains the lack of finished goodies to display. Also, I'm working on several things all at once, so they're all heading toward being finished, but aren't there yet. There's also the fact that I get distracted. Like when I ordered this:


This is my second Japanese clothing magazine, but, after my Burda success, I'm feeling confident enough to tackle one of these purely diagrammatic patterns. Maybe in this lovely fabric:
I ordered it from Bolt 44, an amazing online store with great prices, unique fabrics, and stellar customer service. My original order included a fabric that was listed on their website but apparently out of stock. Upon discovering that the fabric was not available, the folks there called me and asked how I wanted to be credited. They very promptly refunded me the price of the yardage as well as additional postage. In my mind that was a fair way to respond to this mistake and I felt well treated. But, they went even farther by giving me an extra yard of one of the fabrics I'd ordered. How great is that? Of course, that's only adding fuel to the clothes sewing fire.
Another distraction I'm "burdened" with comes in the form of these two books:


Jessica at Black Dog Publishing contacted me a few days ago with a great deal for me...and you. They're offering us a 50% discount on these titles if we order by August 31, 2009. I've read great reviews of these books and Making Craft for Kids was praised in Handmade Nation . I'm also pretty sure I saw mention of it on Whipup . All this leads me to dream about the inspiration yet to be encountered in the pages of these titles and, of course, to distraction. If you want to join me in my wayward path, then contact Jessica at jess@blackdogonline.com with your info including delivery address. Also, don't forget to mention that you're purchasing the book through the "stitch in dye offer" so they'll know to apply the discount.
I'm leaving you with a snippet of one of my several works in progress.


Hopefull, if all goes well, with "well" being a relative term, I'll be back in this space soon showing off some new bit of clothing.

Wednesday, August 5, 2009

Late Breaking News

This just in: The extreme Texas heat resulting in seemingly endless days of 100 degree plus temperatures has resulted in what can only be described as a freak of nature.


A once vigorous though non-producing Peach tree has apparently sprouted a crop of hand dyed and patterned pillow covers.


Stat tuned for further details as they become available.

Monday, August 3, 2009

Invincible

That's how I feel. Not because I scaled Mount Everest or swam the English Channel. No, I'm feeling invincible because I conquered my fear of sewing patterns out of magazines. I bought this one back in May. It took a few weeks for me to work up the courage to trace the pattern and add the seam allowances, but I managed to get that done. I even made it through cutting the fabric. And then it sat...and sat...and sat. The instructions in the magazine aren't particularly complicated, but they're not exactly extensively illustrated and, being a visual learner, I really rely on pictures to explain written instructions. Yesterday, I decided that I'd put it off long enough and the time to sew had come.


It was a lot less painful an experience than I expected. What I discovered was that I've sewn enough clothes to be able to fill in the gaps and that I have my own preferred methods for sewing in a facing or binding a seam. That probably adds to my sense of invincibility.
As to my opinion of these patterns in general, I think paying $9 for a magazine loaded with usable patterns is perhaps the bargain of the century provided that this is not your first or even second sewing experience. The patterns are all graded in terms of difficulty, but the absence of hand holding in the written instructions could make them frustrating for a true beginner. If, however, you've sewn a seam or two, then, wow...these are fabulous, eminently wearable clothes. And having taken this step, I'm feeling emboldened to try my hand at some Japanese patterns. If that goes well, I guess I might just get cocky enough to don my suit and dive into the channel.